
Drake got an easel from Santa this year. He's really been interested in art ever since he started a new preschool this year, and they have an art center. Paintings after paintings have come home (have you seen the app Artkive ? You snap pictures of kid art, tag them with the kids name, date and a title, description, etc. Cuts down on art clutter! You can even make a photo book with them pics...Genius!) Anyway, Drake's art has gone from scribbles to this in the last few months (I did the left two cars, he copied the last one on his own! BTW the lines on the houses are Christmas lights!)

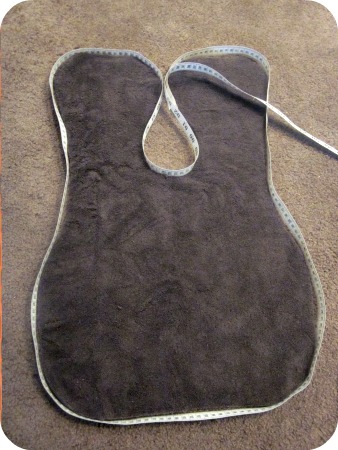
The downside of the marker board is that marker gets on his clothes. So let's make some smocks! I found this tutorial on Pinterest (of course). It has a downloadable pattern and is cut out from an old towel. I had the perfect one, a plush Restoration Hardware one that had a stain and some pulls in it. I was able to get two smocks cut out from one towel, folding the long ends in to the middle. The tutorial says the pattern is for a 2T. I cut it out exactly for my 14 month old, and you can see how I made it longer and wider for Drake, who is 4.5.

The pattern calls for extra wide double fold bias tape. I didn't have any store bought, so of course I decided to make my own. So much cuter, using scraps from old projects! I measured around each smock to see how much bias tape I'd need. For the pattern as is, I made 95" (includes a few inches to spare) and 105" for the larger one.
Then I got to cutting bias strips. I used fabric from both kids' curtains (both Amy Butler, love her fabric!). I had juuuust enough. Love the rotary cutter and mat!

When joining bias strips, I can never figure out how much to overlap them to get a nice continuous piece. So this is what I do: I press the seam allowance:

And then line them up and pin them. Viola! Perfectly aligned strips.

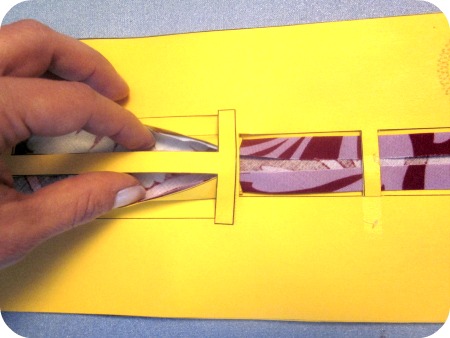
Once the strips are sewn, seam allowances clipped and pressed open, time to iron it into bias tape. I came across this lovely bias tape maker on a blog called The Scientific Seamstress (LOVE the name!). You download and print two sheets on cardstock, cut out the pieces, do some gluing and you have yourself a handy dandy bias tape maker. You feed the tape in from the left, and pull it through, pressing with the iron as you go:

Some comments on her blog says it's a bit finicky, but I didn't have a problem, the only thing I did do was to hold my fingers like so (pressing the fabric to the cardstock), to create some tension and to keep the fabric from slipping:
Look at this beautiful bias tape! So much cuter than the plain stuff you can buy in the store!

I opened up the bias tape and stitched around one side. Pressed and wrapped it around to the backside, pinning in place, ensuring to cover the first stitch line.

Stitched from the front, trying to stay in "the ditch", but since the towel was so fluffy, and I used brown thread, it didn't show at all if I weaved away from the "ditch". I just tried to stay on the towel side and not stitch into the bias tape.

I added some fun pockets. Drake's has car fabric from his 2nd birthday outfit I made him, and Violet's has sweet little gathered pockets.
The backs have snaps. If I did it again, I'd do Velcro or buttons, since the snaps were really hard to set into the plush towel. Also, the pattern has you stitch the sides. I think in the future I'll probably remove this stitching and add ties so that it can grow with them. I'd also say it runs small. The "2T" fit Violet really well at 14 mos, and she's only 8th percentile!

In action!

A bit fuzzy, but I love this angle!

No comments:
Post a Comment