Click below to visit my Etsy Shop!

Wednesday, April 24, 2013

Endada Art and Music Festival!

I have been a creative force to be reckoned with lately!  The last few months I have been preparing for a booth at the 3rd annual Endada Art and Music Festival held at Montgomery Bell Academy, where my husband teaches and coaches.  It's a place near and dear to my heart, as I was a cheerleader there in high school and I coached the cheerleaders the last 6 years myself.  

I have been a mini factory, designing, creating patterns, and sewing toddler clothing.  I love sewing for my own children, and have had so much fun with this endeavor. I made outfits for children sizes 12-18mo, 2T/3T and 4T/5T.  I picked three of my favorite fabrics for each, and made 3 pieces per size.  So that's 27 skirts.  27 shorts.  27 Polos.  27 tops.  I can't get that movie "27 Dresses" out of my head.  Maybe I should have made dresses.  

I've also made hair accessories and some baby items as well....scroll down to see!

Without further ado, here is my collection!  It's simply called {aimée}.

For my fellow MBA fans, gray chevron with cardinal accents.  


I love this blue chevron.  I added colorful fabrics underneath the buttons on the polo and added a coordinating patch pocket.  


The girls top is reminiscent of a tuxedo shirt, with tiny buttons in the center.  I love this boys outfit, with colorful helicopters flying around!


MBA hair bows! I am so excited how these turned out.  I just adore them.  The center is a metal backed button.  I also made pacifier clips with these same buttons.  Adorable!  (I am taking orders for custom logo bows....do you have a team that needs coordinating bows? Contact me at aimeegolenor@yahoo.com)


Look how cute the edge is! ROLL RED ROLL!!!


And now for my models.  My son and daughter were good sports and actually stayed still for a few minutes!


We recruited a few friends on a beautiful day to photograph the clothing.  I love how the pictures turned out, especially the ones with the kids in motion!


Come see me at Endada!

Wednesday, April 10, 2013

POW! BAM! Comic Book Murals


My best friend Jess is renovating her house, and has the cutest room for her son, who is 6.  He's totally into superheros right now, so that's the theme of the room.  She had an awesome idea to have some murals on the wall, and I jumped at the opportunity.  I love to paint on walls.  Just ask my mom, when I was little I drew all over my bedroom walls.  I was only about 3 at the time, but I have definite memories of having to clean it up myself.  

My first step was to design something in Powerpoint.  I like using Powerpoint for graphics, I feel like you can manipulate things easily and change things.  Perfect for roughing up an idea.  Jess sent me a few ideas that she'd seen and I worked from there.  Here's what I came up with:


Jess has a tiny projector that you put a USB memory stick in, and can project on to the wall.   I taped off the points, and used a trick that I love to make the edges really sharp.  You know how sometimes when you peel back the painters tape, it bleeds a bit and looks rough?  Can't have that in a superhero's room!  The trick is to take the wall color (or clear acrylic craft paint if you don't have wall color), and paint from the inside toward the outside, filling up any gaps with wall color/clear.  After this dries, you can paint whatever color you want, and when you peel the tape, it's a perfect, razor sharp edge!  I used this trick in Drake's bedroom, where I did an orange stripe around the room. 


Jess graciously put on a coat of primer before I came back the next time, so the white background would be really opaque.  Then I hooked up the projector again and sketched out the design.


I started filling in the color, and it began to came alive! I also added primer where the letters extended past the points (probably should have done this at the same time as the points, oh well)


The final step was to outline in black.  This was the trickiest part.  I used a Sharpie and a straight edge for the most part, but the tip kept getting gunked up with residue from the paint or something, so I used a paint pen as well.  Same thing happened with the paint pen, but somehow I was able to get it outlined just enough. I used black paint to fill in the larger areas after outlining with the Sharpie.

The black just makes it jump out of the wall, doesn't it? Very dynamic if I do say so myself! All in all, I think it took me about 12 hours to complete both murals.   Almost hard to tell this one from the Powerpoint one!


And a few shots of the darling room.  I love how it's a classic room infused with some fun superhero stuff added in.   I love the white wood ceiling, it's just so inviting.  


I love the superhero sheets! Adorable.


Sunday, April 7, 2013

Crochet Toys


I love creating toys for my kids.  It's so fun to create imaginative, colorful, simple things that they will love.   

I love these blocks that I made for Drake when he was a baby.  Soooo simple, no pattern, just single crochet squares and whip stitch them together, stuff them with foam and add decorative details. A great way to use up all those yarn remnants!  I ran out of a few colors, so added squares and circles of other colors.  I think it worked out fine!


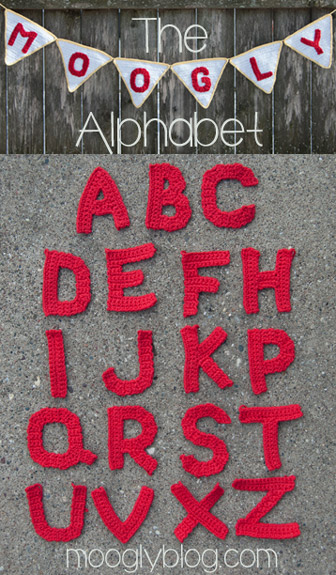
I did the letters free hand crochet, just making it up as I went, but here is a great tutorial for crocheting letters (click here):


Hoo! Hoo! I love this little owl.  So cute!  Here's his original pattern, which called for hard doll eyes.  I crocheted little circles instead so he was all soft.


Look at this little guy! I'd like you to meet Chubby the Fish:  


He was pretty easy to make, though I will say the tail was a little more challenging.  Blub blub blub!  Click here for Chubby's pattern.  

Do you know about Ravelry.com?  What an amazing site for crochet and knitting.  There are tons of patterns, and you can look through other people's projects as well.  The link above to Chubby's pattern lets you look at it as a guest, but if you sign up (free), you get many more options.  Here's a screenshot of Chubby's pattern, while I'm logged in.  See all these tabs along the top of the pattern now?


 The big arrow is pointing to "94 projects".  This means that 94 other people have made this project, and if you click there, you can see 94 different versions of this fishie!  I love looking through blankets for instance, and seeing all the color and yarn choices people choose, and how different each project looks.

Another great aspect of this site, is that it allows you to search for a certain yarn, and then look at all the different projects people have made with the particular yarn and color you have in your stash, for instance.   If you crochet or knit, hop on over to Ravelry.com and set up an account.  You will thank me, I know!

Monday, April 1, 2013

No Sew Headband Storage


I was looking for a way to display my headbands I'm going to sell at the Endada Music and Art Festival at MBA in April, and decided to create a display using....wait for it...a roll of paper towels.  It's just the right diameter! I wanted a paper towel dispenser to stand the roll up, and was thinking of using one of those wooden dowel type ones that sit on your counter.  I didn't want to spend much money on it, so I got in my car and sang rather loudly "GOODWILL....POPPING TAGS....", lol.  I found this cute little paper towel dispenser for just a few bucks.   It has a metal rod that goes through the hole in the top to secure the roll.  But, it was dirty and had some stains on it.

I gave it a good coat of primer.....


And a few coats of spray paint in my favorite color.....so much better! 


On to the paper towel roll itself.  Now, in my title, I say "no sew".  And it would be, if I didn't piece some scrap fabric together.  So I lied.  But you can do it without sewing if you have a piece of fabric big enough.  This was 18" wide x 19" tall.  Like my neon pink big toes? 


 I put the roll in the middle of the fabric, wrapped the fabric around it, and stuck some pins directly into the roll to hold it in place while I got my glue gun.  One stripe of hot glue was all it took to secure the fabric around the roll.  Then I removed the pins.

I stood the roll on end, and tucked the fabric into the paper towel roll.  I put a few dabs of glue in the tucks, just to hold its shape better.


Finished roll:


And the finished product!   It will be so cute for selling items (I'll display one of each color and then have stock in a box under the table), but then awesome for storing headbands at home too.  Regular "U" shaped ones will just slide on and off easily.  Also, if the stretchy headbands are bigger than your roll of paper towels, you can stick pins in the back to hold them in place!